Business Advice6 min
Taping in Tricky Areas
No matter the product you're installing, proper technique and a few useful hints help ensure the product performs well for years to come. As an integrated WRB system, LP WeatherLogic® Air & Water Barrier represents a premium solution for building professionals. The panels install like OSB, and when the joints are sealed with LP WeatherLogic Seam & Flashing Tape, the system helps seal against water intrusion to finish the job.
Taping across the panels of a wide, flat side of the house is fast and easy. But even seasoned pros can get tripped up on the finishing process when encountering other areas of the build, such as eaves, corners and wall penetrations. Let's take a look at the best flashing tape techniques to achieve a good seal.
What Is Flashing Tape?
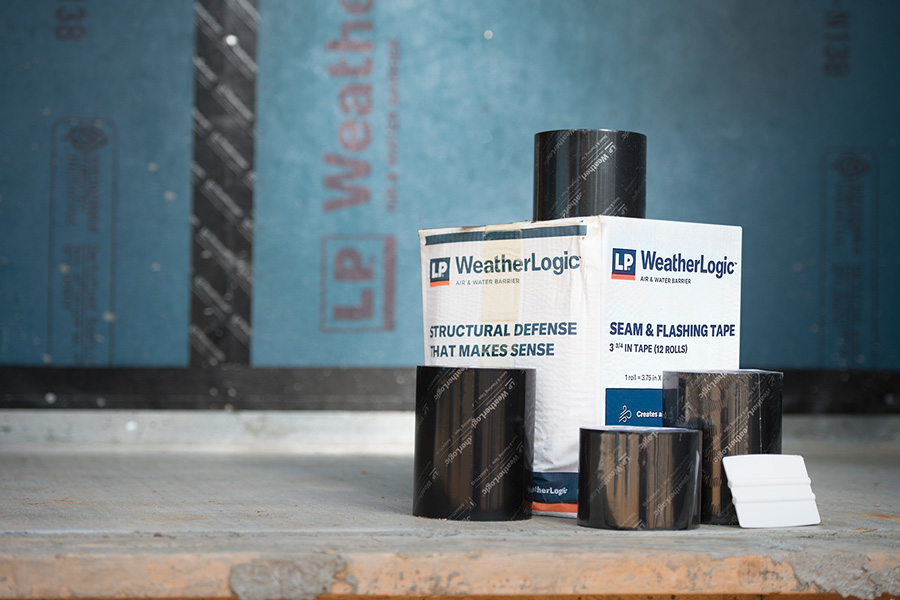
Flashing tape provides an additional safeguard against water and air intrusion when used as part of an integrated WRB system. LP WeatherLogic Seam & Flashing Tape is specifically designed to work with LP WeatherLogic panels to deliver consistent long-term protection. Certified to AAMA 711-13, the tape uses one of today's highest quality adhesives and can withstand temperature cycling.
LP WeatherLogic Seam & Flashing Tape rolls are included with the panels and come in 3-3/4-inch and 6-inch widths. The wider flashing tape can be used for window flashing and is preferable for taping inside and outside corners.
What Is the Best Tape for a Water Barrier?
Finding the best tape for a water barrier can help prevent water and air infiltration for your build. Construction Instruction, an independent building science group, conducted side-by-side testing with LP WeatherLogic panels and commodity-grade water-resistive barrier (WRB) over standard OSB sheathing.
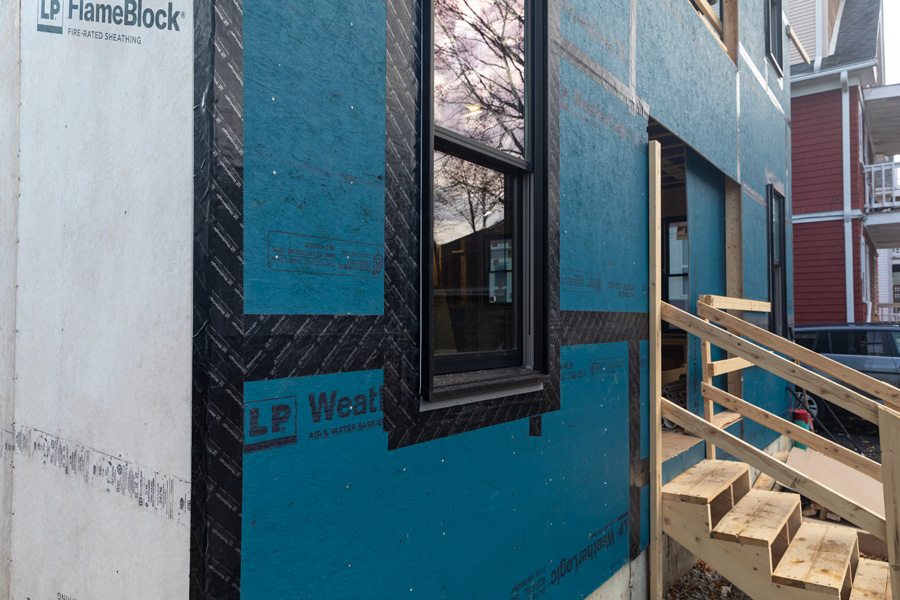
A standard window was installed with LP WeatherLogic tape on the LP WeatherLogic panel side and window flashing tape on the standard WRB side. After simulating a 50-mph rainstorm for 15 minutes, the team found the commodity-grade housewrap allowed water to leak into the wall cavity while the side with LP WeatherLogic panels showed no signs of water intrusion. See the test in full here.
How to Use Flashing Tape
Ensuring a proper seal at any interface can be tricky, and those areas where walls and roofs intersect can be especially tough. Installing LP WeatherLogic tape correctly and making sure you have a good seal is critical. Always make sure you apply the tape using firm pressure with the squeegee to ensure proper adherence. Be sure to consult the complete LP WeatherLogic flashing tape installation instructions before beginning.
Flashing Tape Installation: Inside and Outside Corners
Taping inside corners can be tough, but with a bit of practice and these tips you'll soon get the hang of it.
6-inch LP WeatherLogic Seam & Flashing Tape is recommended.
Center tape in the corner.
Use the included squeegee to tightly push and crease the center of the tape fully into the corner.
Adhere tape to both sides of the corner.
Alternatively, two layers of 3-3/4-inch LP WeatherLogic tape can be used.
Apply the first layer of tape to one side of the corner, leaving 1 inch to adhere to the opposite side.
Use the squeegee to crease and tightly push the tape into the corner.
Apply a second layer of tape to the other side of the corner, leaving 1 inch of tape to adhere over the first tape on the opposite side. Use the squeegee to crease and tightly push the tape into the corner.
Here are instructions on the proper technique for taping outside corners:
6-inch LP WeatherLogic Seam & Flashing Tape is recommended. Center tape over the corner. Fully adhere half of the tape width to one side and then tightly wrap over the corner to adhere the tape to the adjacent side.
Alternatively, two layers of 3-3/4-inch LP WeatherLogic tape can be used.
Adhere the first layer of tape 2 inches to one side and fold over the corner.
Adhere the second layer of tape 2 inches to the opposite side and fold over the corner to overlap the first tape.
Flashing Tape Installation: Wall Penetrations
You will likely encounter penetrations with either straight or curved sides. Here are the proper sealings for both of these common areas:
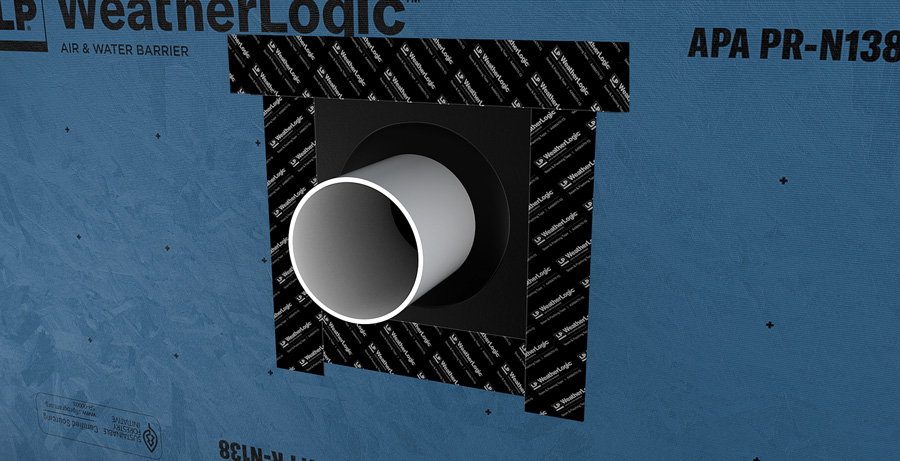
Penetrations with flanges with straight sides:
If used as an air barrier, apply LP WeatherLogic Seam & Flashing Tape across the bottom. Center tape on the edge of the flange and extend approximately 1 inch past both sides. Do NOT extend tape more than 1-1/4 inches past the side flanges to ensure sufficient surface area for overlapping tape (next step) to bond to the panel.
Apply the tape to both side flanges. Center tape on flanges and extend approximately 1 inch past the top flange and at least 1 inch past the bottom flange tape. Do NOT extend tape more than 1-1/4 inches above the top flange to ensure sufficient surface area for overlapping tape (next step) to bond to the panel. The tape can extend more than 1 inch below the bottom flange tape.
Apply the tape to the top flange. Center tape on the flange and extend at least 2 inches past both pieces of side flange tape.
For straight-sided shapes other than rectangular, repeat the step for each “side flange,” working from bottom to top of the penetration.
Penetrations without flanges (or with curved sides):
Option 1: Use an approved flashing boot over the penetration. Secure the boot in accordance with the boot manufacturer's instructions and tape the boot to the panel with LP WeatherLogic Seam & Flashing Tape according to "Penetrations with Flanges" instructions.
Option 2: Use a flexible ("stretch") adhesive-backed flashing tape approved to AAMA 711-13 (711-20 for the 2021 IBC or IRC), a liquid-applied flashing certified to AAMA 714-15 (or newer) or a flexible flashing evaluated to ICC-ES Acceptance Criteria for Flexible Flashing Materials (AC148). Install in accordance with the manufacturer's instructions.
Flashing Tape Installation: Eaves and Wall-to-Roof Transitions
These unique applications require specific sealing techniques as well.
Tape roof-wall seam as an “inside corner” and install flashing at roof-wall transition as required by code.
Apply the LP WeatherLogic Seam & Flashing Tape to seal the top of the flashing. The tape should extend at least 2 inches onto the panel face and cover all fasteners used to attach the flashing. If the fasteners are placed so that the standard 3-3/4-inch tape cannot cover and extend 2 inches onto the panel, use the 6-inch tape or shingle multiple rows of 3-3/4-inch tape so that a layer above overlaps the layer below and covers the fasteners.
Start here to learn more about why you should use a good flashing tape, and then head over to our installation page to learn more flashing tape installation techniques.
Continue Reading
Resiliency Solutions
5 minIntroducing LP® SmartSide® ExpertFinish® Naturals Collection™: Nature-Inspired Beauty Meets Engineered Performance
We're excited to introduce the LP® SmartSide® ExpertFinish® Naturals Collection™, a bold new addition to our trusted line of engineered wood siding and trim that delivers the warmth and beauty of nature with the advanced protection and performance builders and homeowners expect.
Labor Solutions
5 minChoosing the Right LP® Structural Solutions Product for Your Build
When it comes to building strong, reliable, and high-performing structures, the materials you choose matter. At LP Building Solutions, we understand that every project, whether it's a single-family home or a multifamily development, requires structural components that meet your needs for strength, durability, and efficiency.
Sustainability Solutions
5 minBuilding a More Sustainable Future with LP Building Solutions
In today's world, sustainability is no longer just a buzzword, it's a blueprint for responsible living and smarter building. As the construction industry seeks ways to reduce its environmental footprint, LP Building Solutions is focused on providing innovative building materials for eco-conscious builders to help reshape what it means to build sustainably
News & Stories3 min
History of Partnership with Gary Sinise Foundation
The LP Foundation is a proud partner of the Gary Sinise Foundation, which supports wounded veterans in several ways. You can learn more about the LP Foundation here.